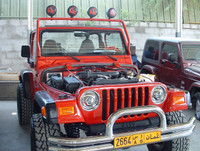
American Expedition Vehicles TJ Heat Reduction Hood
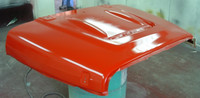
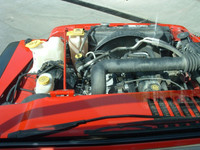
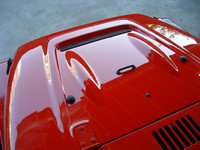
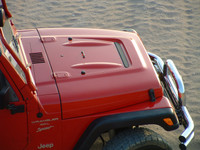
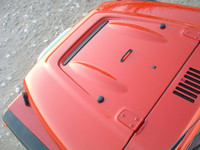 The American Expedition Vehicles TJ Wrangler (97+) Heat Reduction Hood is designed to reduce the under-hood air temperatures by venting the air directly out of the engine bay. When the vehicle is moving, the aerodynamics create a natural low pressure zone above the hood. You may have heard or witnessed the Hood trying to "lift up" on older Jeeps when the tie-downs are slightly worn. This will give you an idea of just how strong the aerodynamic force is. When the Jeep is stationary, the vent in the hood blows the air directly out thanks to the stock Radiator Fan directly below it. Even at a stand still, you could re-heat your lunch on this thing! The American Expedition Vehicles TJ Wrangler (97+) Heat Reduction Hood is designed to reduce the under-hood air temperatures by venting the air directly out of the engine bay. When the vehicle is moving, the aerodynamics create a natural low pressure zone above the hood. You may have heard or witnessed the Hood trying to "lift up" on older Jeeps when the tie-downs are slightly worn. This will give you an idea of just how strong the aerodynamic force is. When the Jeep is stationary, the vent in the hood blows the air directly out thanks to the stock Radiator Fan directly below it. Even at a stand still, you could re-heat your lunch on this thing!
The steps to install this hood are pretty simple but they are quite time-intensive, especially when you get round to painting. It would be a good idea to expect around 4 days for repairing, painting, polishing and installation. The Hardware will be re-used from your old hood but there have been some subtle changes over the years, or you may have difficulty getting them out. To save time, it would be a good idea to ensure you have the following parts ready:
 If your Jeep was made before 2003 and has the two seperate windscreen washers, you will need the post 2003 Single Nozzle, Jeep Part Number 55156728AA.
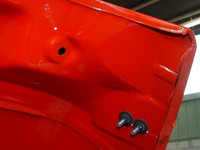
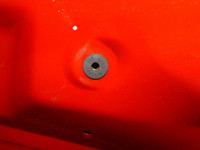
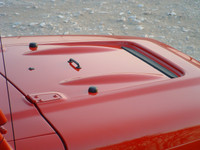
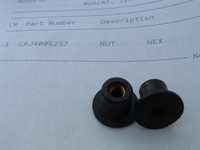 The nuts in the front corner of the hood that hold the small rubber buffer on are apparently re-useable, however we couldn't remove them from the stock hood. When tightened down, these expand to fill the hole and lock in. On a newer vehicle you may be able to work them free, but ours weren't going anywhere even with quite a lot of force! These are Part Number CRJ4005237 and it would be a good idea to get a pair of these before starting, to save the risk of damaging your stock hood.
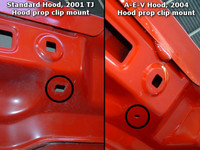 Check that your current style of hood prop clip is compatible with the new circular hole. Find something that will work or as we will be doing next, install a Kilby Gas Strut Hood Lift Kit for one-handed opening of the hood with no need for a support prop.
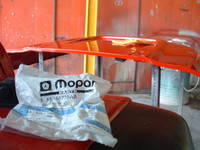
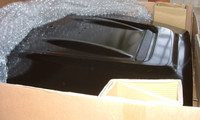 When you get your Hood from AEV, it arrives e-coated and ready to paint. It's important to inspect the hood fully before painting as damage can and does occur during shipping. Ours had travelled ~10,000 miles by the time it got to Oman. We arranged to have some extra protection for the hood before sending it to the middle east, and this definitely helped. It could have been worse! We chose the Jeep Dealer to paint it to get a perfect match to the Jeep's paint. A body shop could repair any mild damage, but shipping insurance is a MUST!
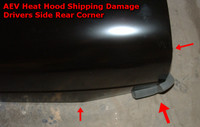
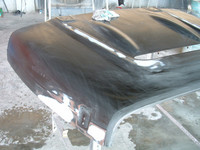
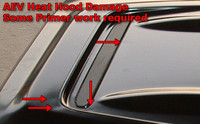 Our Hood required some straightening in the rear corner and then some minor dents sorted out on the top of the hood. The guys at Shanfari Automotive, the Jeep Dealer, did a fantastic job of this. The rear was bent back into shape and the dents were smoothed out, filled and wet sanded down for a perfectly smooth finish. The white areas in the pictures below show the amount of re-touching we had to do.
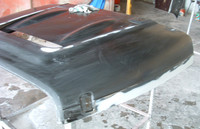
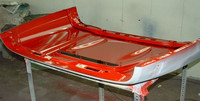
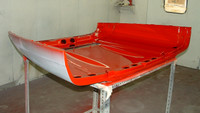 Next stage is to get the hood painted! We actually removed the mesh screen first, although AEV actually recommends that you just leave it on and mask around it, as we found out later! This is to prevent you doing any damage when you replace the mesh after the hood is already painted and it's too late. The Mesh is just e-coated and does actually need to be painted black, or whatever colour you choose. It will oxidise, (Rust), if you leave it, so don't skip that step! Take great care when removing the mesh piece and replacing it, as overtightening the nuts will cause a dimple in the top of the hood. Next stage is to get the hood painted! We actually removed the mesh screen first, although AEV actually recommends that you just leave it on and mask around it, as we found out later! This is to prevent you doing any damage when you replace the mesh after the hood is already painted and it's too late. The Mesh is just e-coated and does actually need to be painted black, or whatever colour you choose. It will oxidise, (Rust), if you leave it, so don't skip that step! Take great care when removing the mesh piece and replacing it, as overtightening the nuts will cause a dimple in the top of the hood.
The next step is one that you may not have considered, but still important... wash the Jeep! You're just about to fit a new major part of the bodywork that has fresh paint on it, so if your other bodywork is even slightly dusty you will be thinking the new paint is too dark and you'll have trouble sleeping and it will be a nightmare. You can avoid this stress by just washing it the night before it gets fitted! This also means when you take off your old hood for storage, you're not storing it with the dust on it which can scuff the paint on it if you move it around in the box.
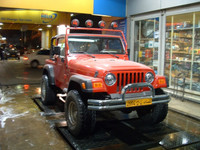
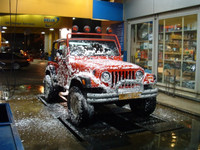
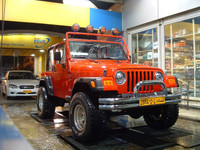
Wash, Soap, Wax, Rinse, Dry, Looks like new! The Car Wash at Shell in Sarooj Plaza, Shatti is definitely well recommended. They will wash the Jeep even with the roof off, without getting the interior wet, and it comes back like a brand new vehicle.
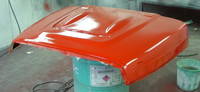
Now with the vehicle fully cleaned, and the hood painted and polished, it's time to install it! The wait is over!
 The hood comes off surprisingly easy, just remove the hinges, pop the catches and away you go. Don't forget to disconnect the washer hose and the Light wires before lifting it off! For those on a budget, stopping now is a real effective way of keeping it cold, I just don't think you will get very far driving on public roads like this! :)
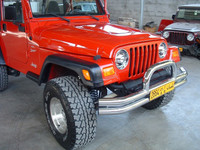 With the old hood out the way, we then fitted the AEV Heat Reduction Hood for the first time and ensured everything lined up perfectly. A little alignment was needed but other than that, it's perfect!
Now we begin the process of stripping the fittings off the old hood and placing them on the new hood.
 We began by removing the latches from the old hood and transferring them to the new one. There is some play in these so you will want to close the hood and make sure they are lined up straight before finally tightening them.
 Now AEV says that the nut inserts that secure the front bumpers on the hood can be extracted from your stock hood by removing the bumper, replacing the screw without the bumper, and then gently pulling it out. We tried pulling it gently... we tried pulling it quite hard. We tried protecting the hood and pulling it VERY hard. It refused to budge. Rather than risk doing damage, we went to the parts counter and got the new nuts mentioned above, Part Number CRJ4005237. These new ones just pop in easily and will expand when you tighten them.
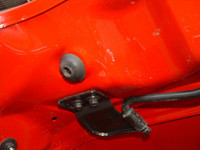 We then fitted the rubber bumper and then mounted the hood support prop. Pretty simple here! Then this was the point we discovered the hood catch was incompatible. We found a catch that was compatible and this will do until we install the Kilby Hood Lift system.
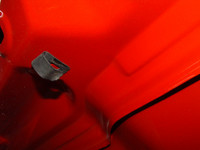
The footman loop installs easily, just be sure to use two stainless steel washers on the bottom to reduce the stress on the hood metal. The rubber bumpers that the window rests agains pop out with enough force and can be pushed straight into the new AEV hood. If you have difficulty doing this, try using a little bit of soap to push them in.
 The washer nozzles on the pre-2003 Jeep Wranglers have a T-connection to split the water path into two. Remove the pipe from the connector and push it on to the new single nozzle. Simple.
 The engine bay light just gets pulled out of the old hood and inserted in the new one, and don't forget to hook the wire back up to it.
 And with that, you should be all done! Double check the old hood to make sure nothing is left on there that shouldn't be. If you removed the mesh insert earlier and left it until the end to replace it (which you really shouldn't), be EXTREMELY careful not to overtighten the nuts or you could ruin a fantastic finish.
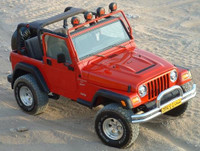
Now sit back, open a soft drink and admire how good your Jeep looks now! Start the engine and feel the hot air pumping out of that vent! You're Done!!
|
| AEV Heat Reduction Hood |
Contact Info:
Quadratec
| Product numbers: |
| # 12503 100: | AEV TJ ('97+) Heat Reduction Hood |
| # 13027 00: | CJ/YJ/TJ ('72-Current) Hood Lift |
American Expedition Vehicles - AEV
|
|
If you found this installation guide useful, please support this site by using the Referral links to Quadratec on this site when purchasing your Jeep accessories. Quadratec has extremely competetive prices and fantastic customer service. Support our sponsors and we will be able to add new installation guides in the future! on this site when purchasing your Jeep accessories. Quadratec has extremely competetive prices and fantastic customer service. Support our sponsors and we will be able to add new installation guides in the future!
Back to the Installs index
|
|